部署和配置 Unraid OS
首次启动 Unraid OS 后,您将使用 WebGUI 完成系统配置。此界面允许您管理服务器、设置存储、配置用户共享功能以及控制诸如 hardware virtualization 和 Docker 容器等功能。
:::info[Localize]
It may be easier for users to follow this guide after configuring their language settings. Check out Multi-language support to make the WebGUI more accessible in your preferred language.
:::
连接到 Unraid WebGUI
您可以通过两种方式连接到 WebGUI:
- GUI 模式: 在 GUI 模式下启动 Unraid,并使用连接到服务器的键盘和显示器进行登录。使用
root作为用户名,初始密码为空。 - 网页浏览器: 在本地网络上的其他设备上,访问
http://tower.local。如果您设置了不同的主机名,请使用它代替tower(例如,对于主机名unraidserver,您应该访问http://unraidserver.local)。mDNS 处理这些.local地址的解析。
Unraid 服务器在完全启动后即可在您的局域网中访问。您可以在路由器的 DHCP 客户端列表中找到 IP 地址,或使用网络扫描工具获取。
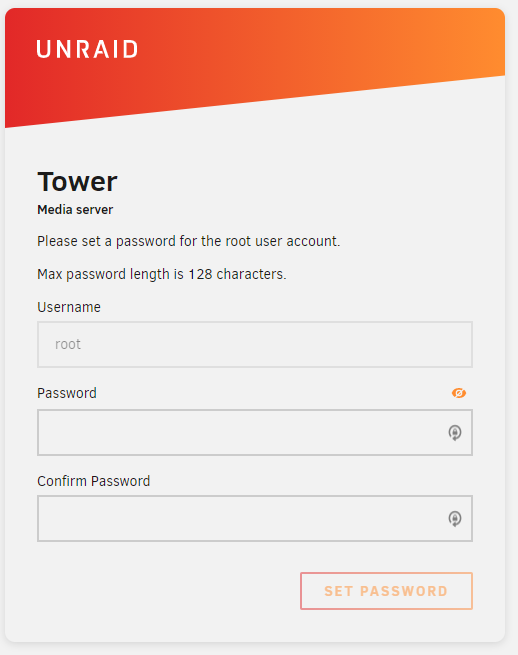
设置 root 密码
首次访问 WebGUI 时,系统会提示您为 root 用户 创建强密码。
我们推荐使用密码管理器来安全存储。
- 唯一
- At least 8 characters long. (Although, best practice recommends 12+ for the most secure passwords!)
- 字母、数字和特殊字符的组合
我们推荐使用密码管理器来安全存储。
Onboarding
The onboarding wizard below applies to Unraid 7.3 and later.
-
Press Get Started to launch the onboarding wizard. If you prefer to configure manually, select Skip Setup.
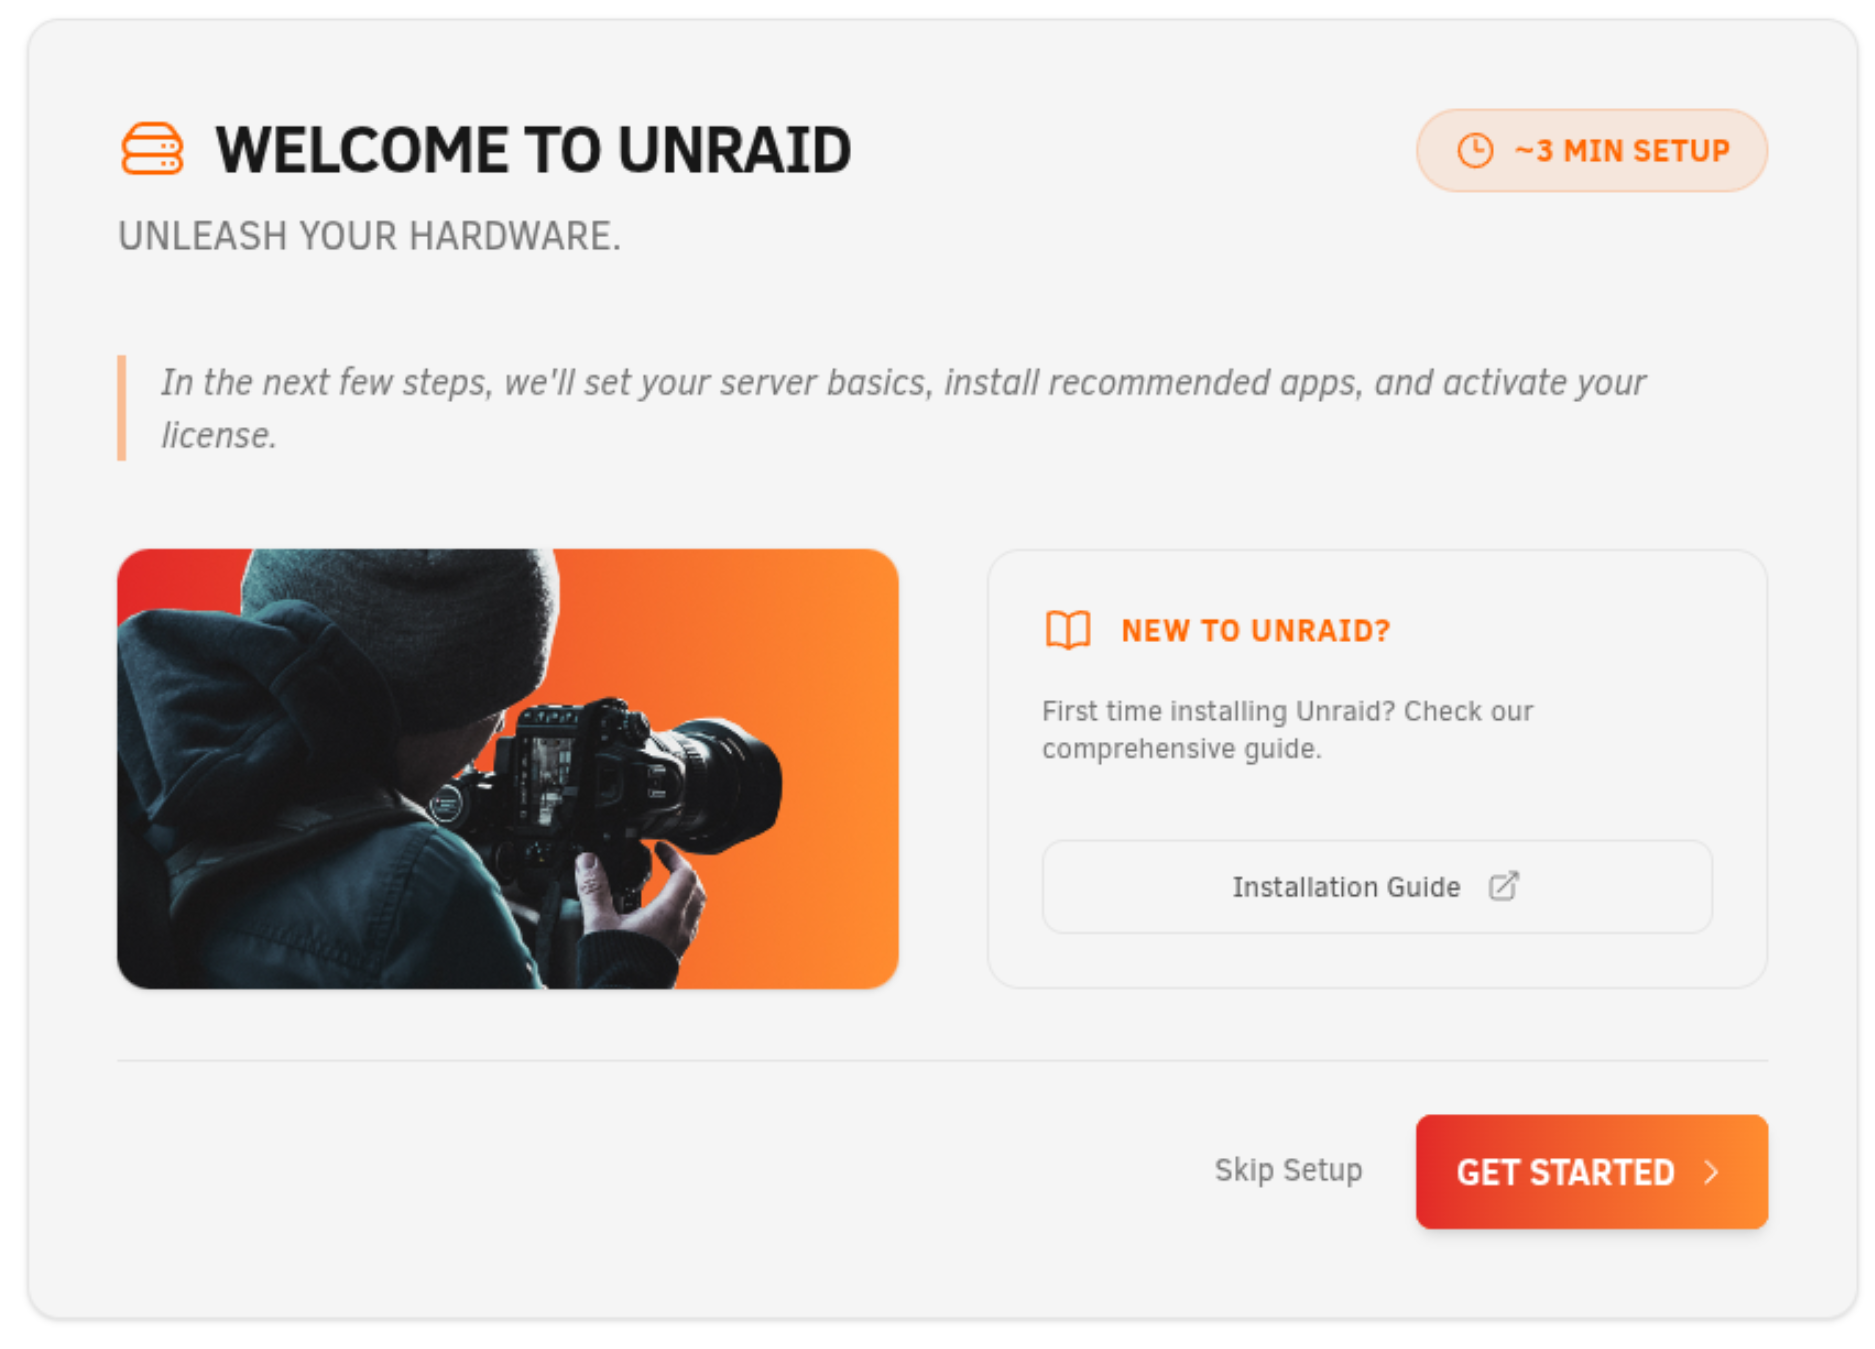
To relaunch the wizard later, go to Settings → Onboarding Wizard.
-
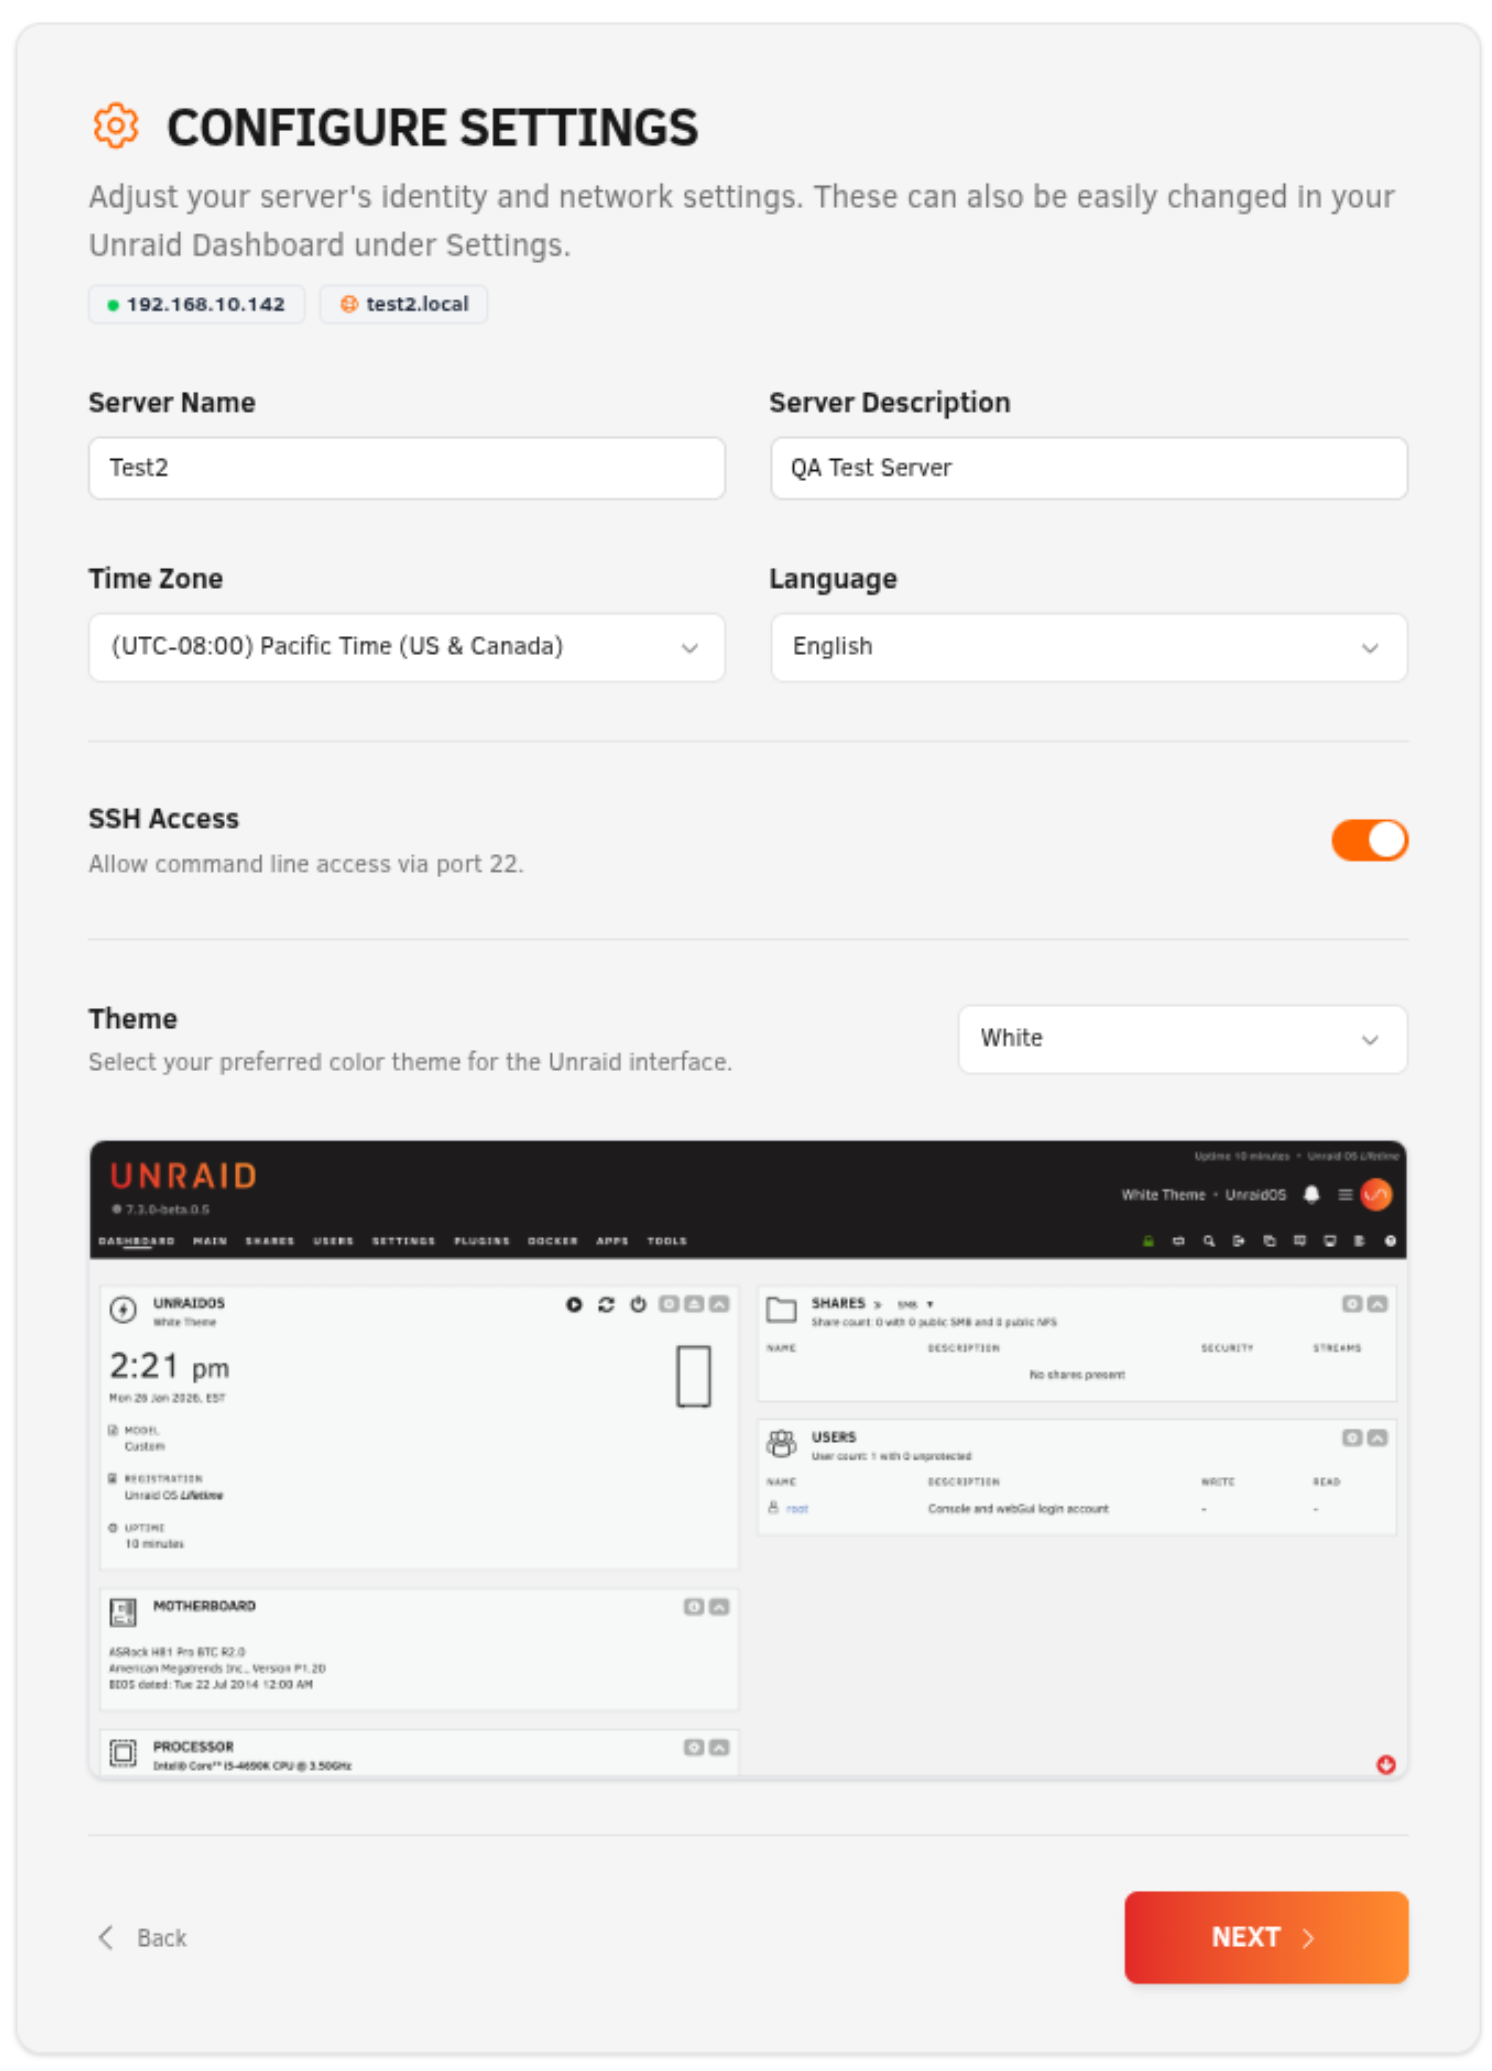
Configure your server settings, including server name and description, time zone, language, and optional SSH and theme preferences. Then click Next.
-
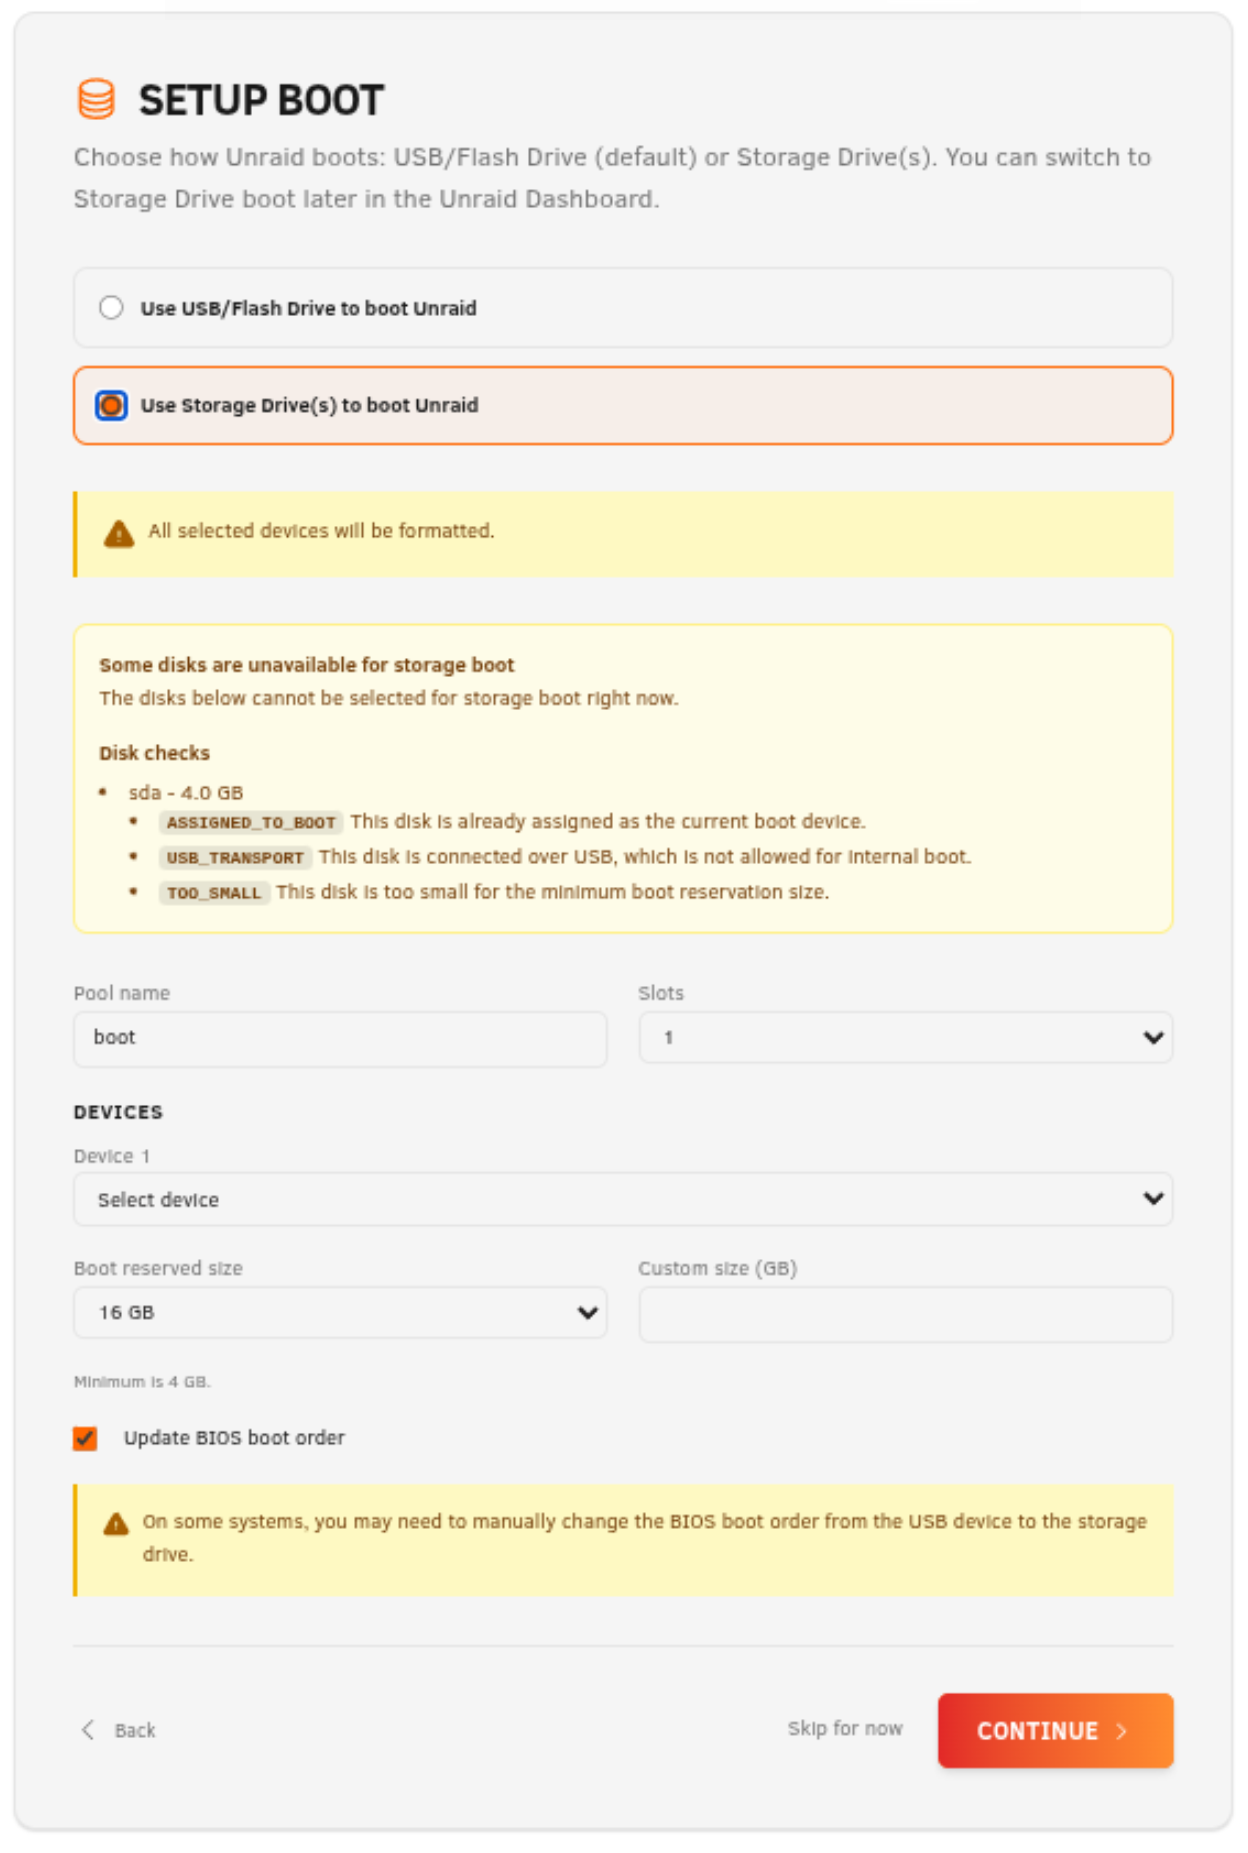
Choose your boot option:
- For flash boot, keep the default USB/flash boot configuration and click Next.
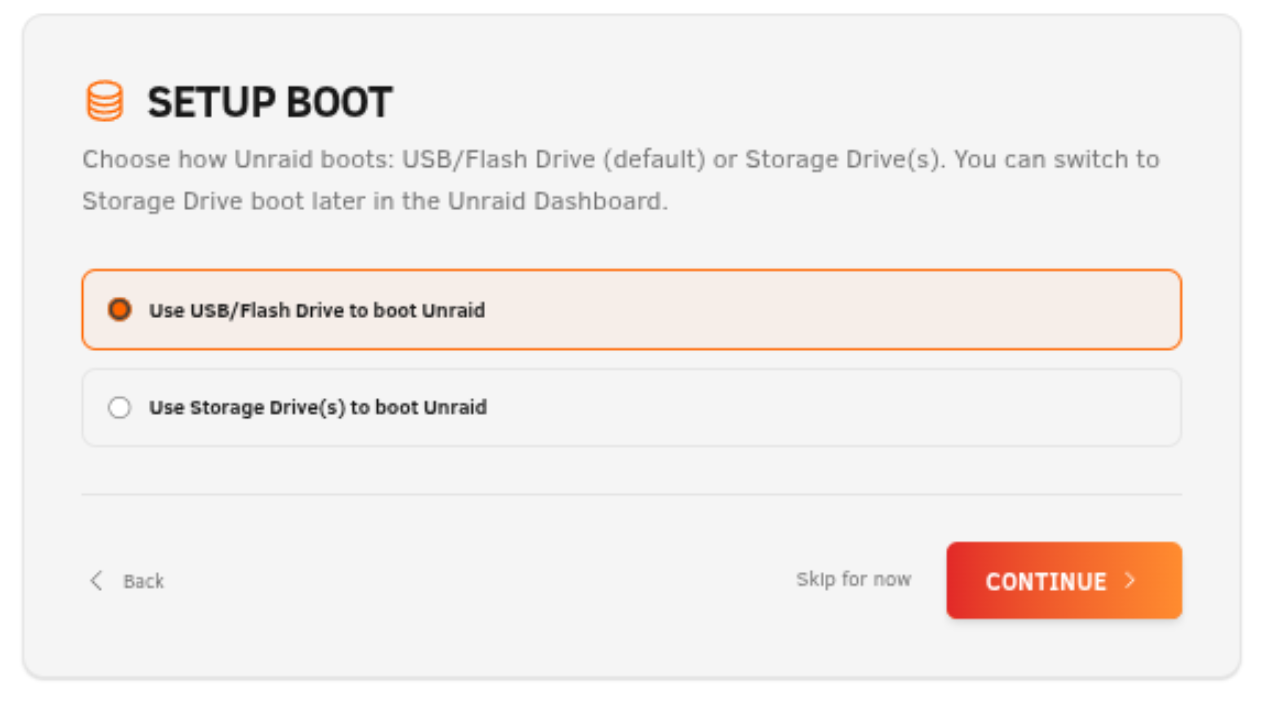
- For internal boot, choose single or mirrored boot mode, select the device(s), and set the space reserved for the boot partition. Then click Next.
If you have questions about device counts or mirrored boot, see the Internal Boot FAQ (7.3+), which also includes video walkthroughs. For TPM-based licensing questions, see the TPM Licensing FAQ (7.3+).
-
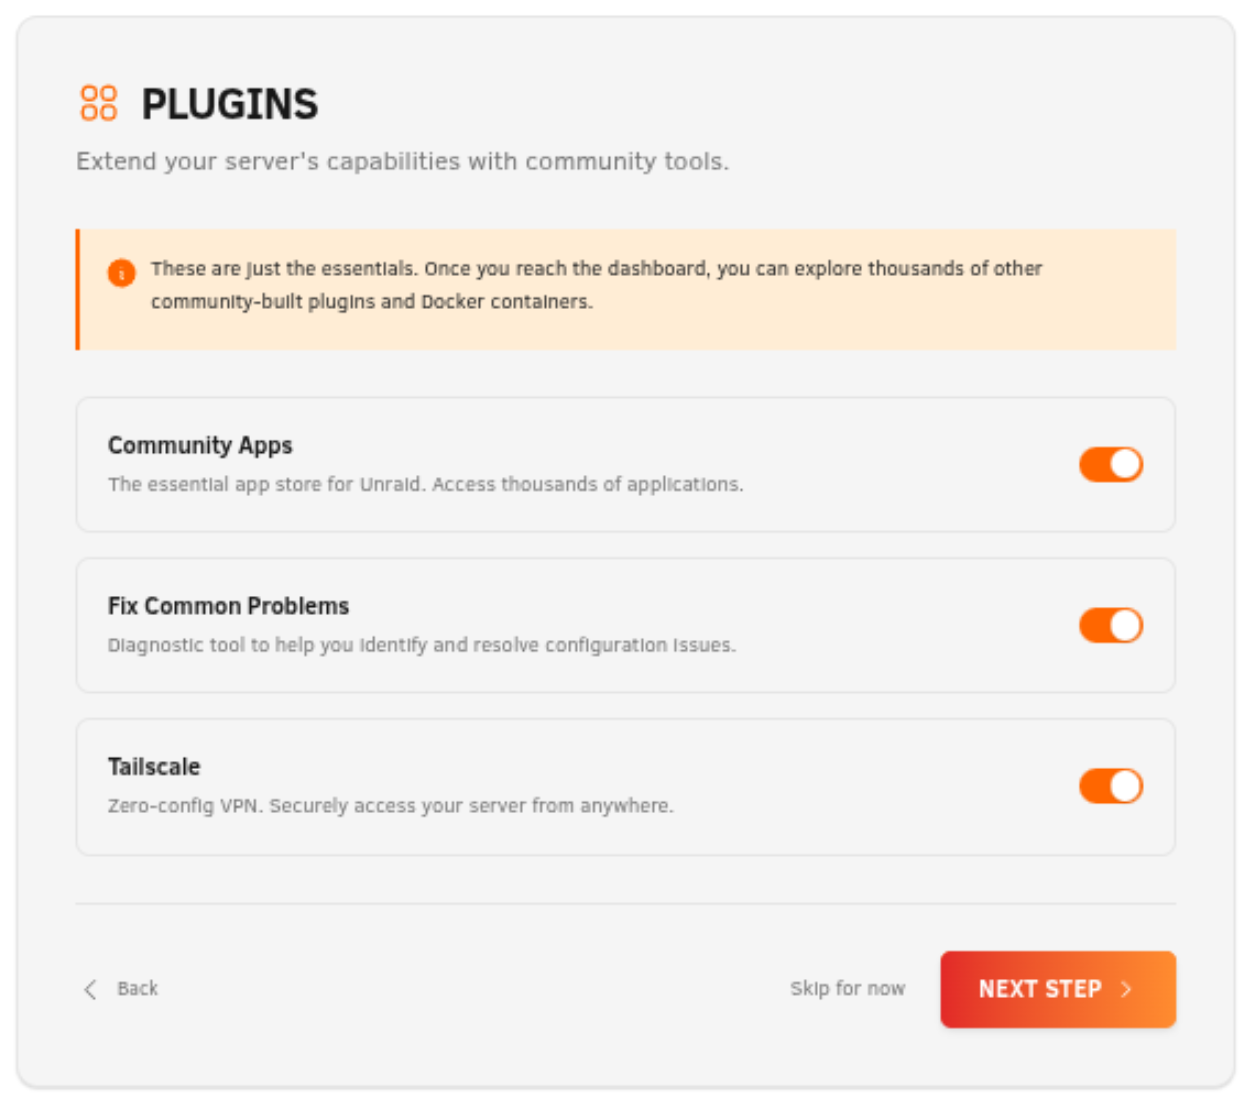
Optionally choose whether to preinstall key plugins, then click Next.
-
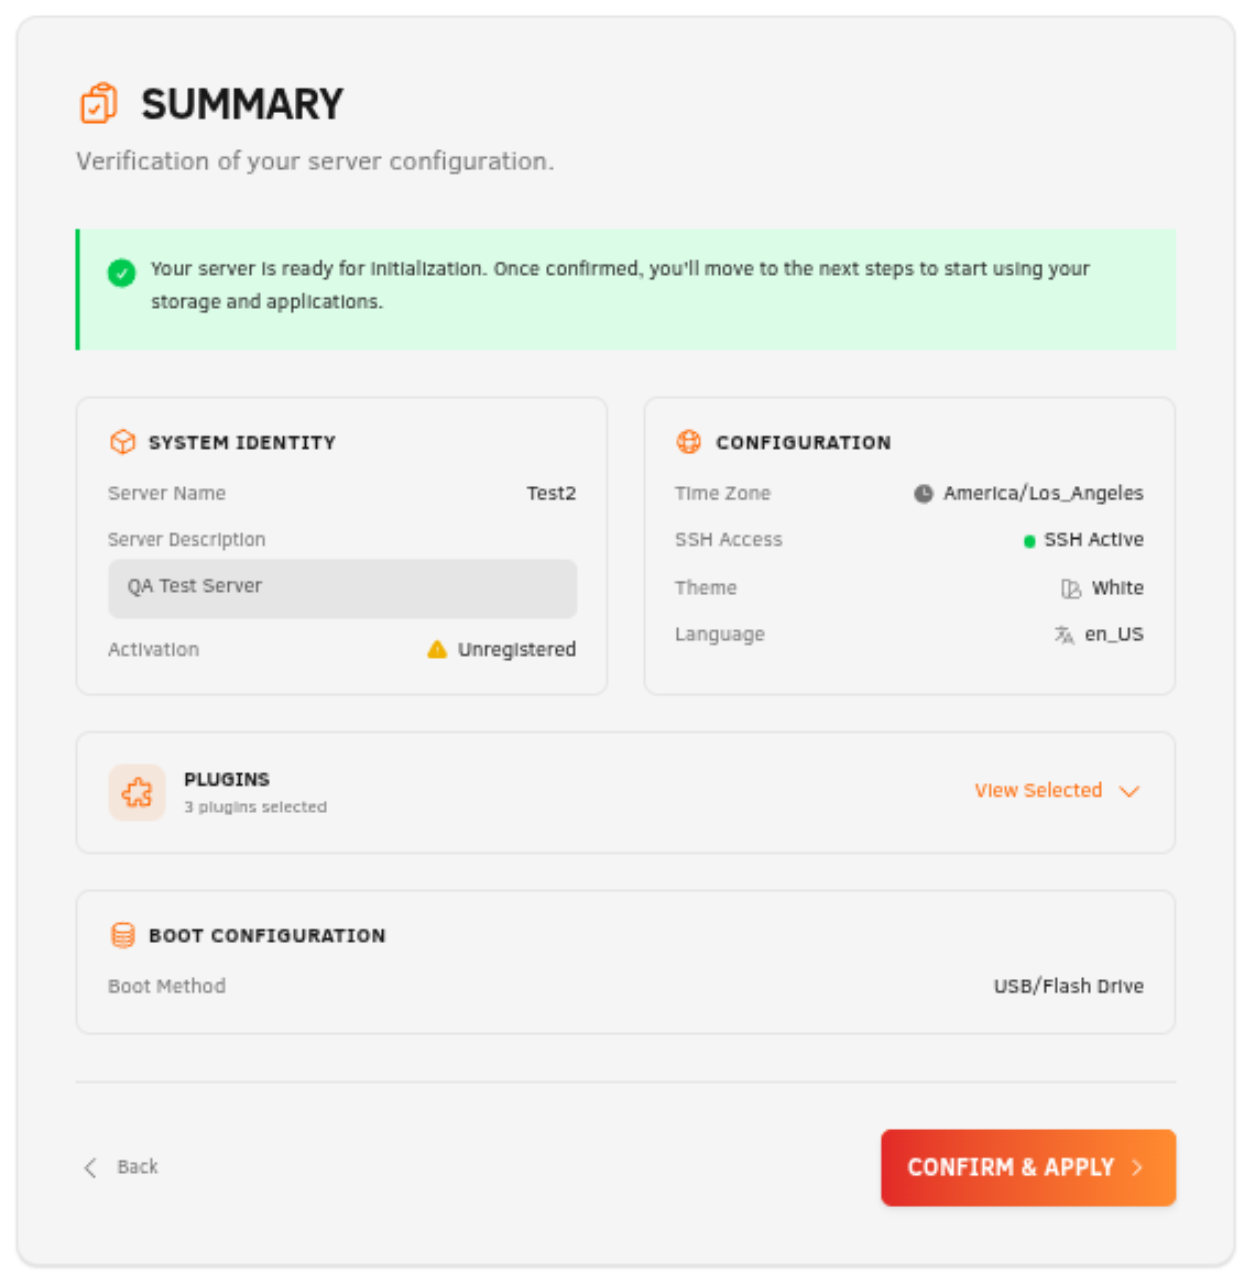
Review the summary, then click Confirm & Apply.
-
On the Next Steps screen, review the recommended follow-up actions, then click:
- Go to Dashboard if you chose flash boot
- Reboot if you chose internal boot
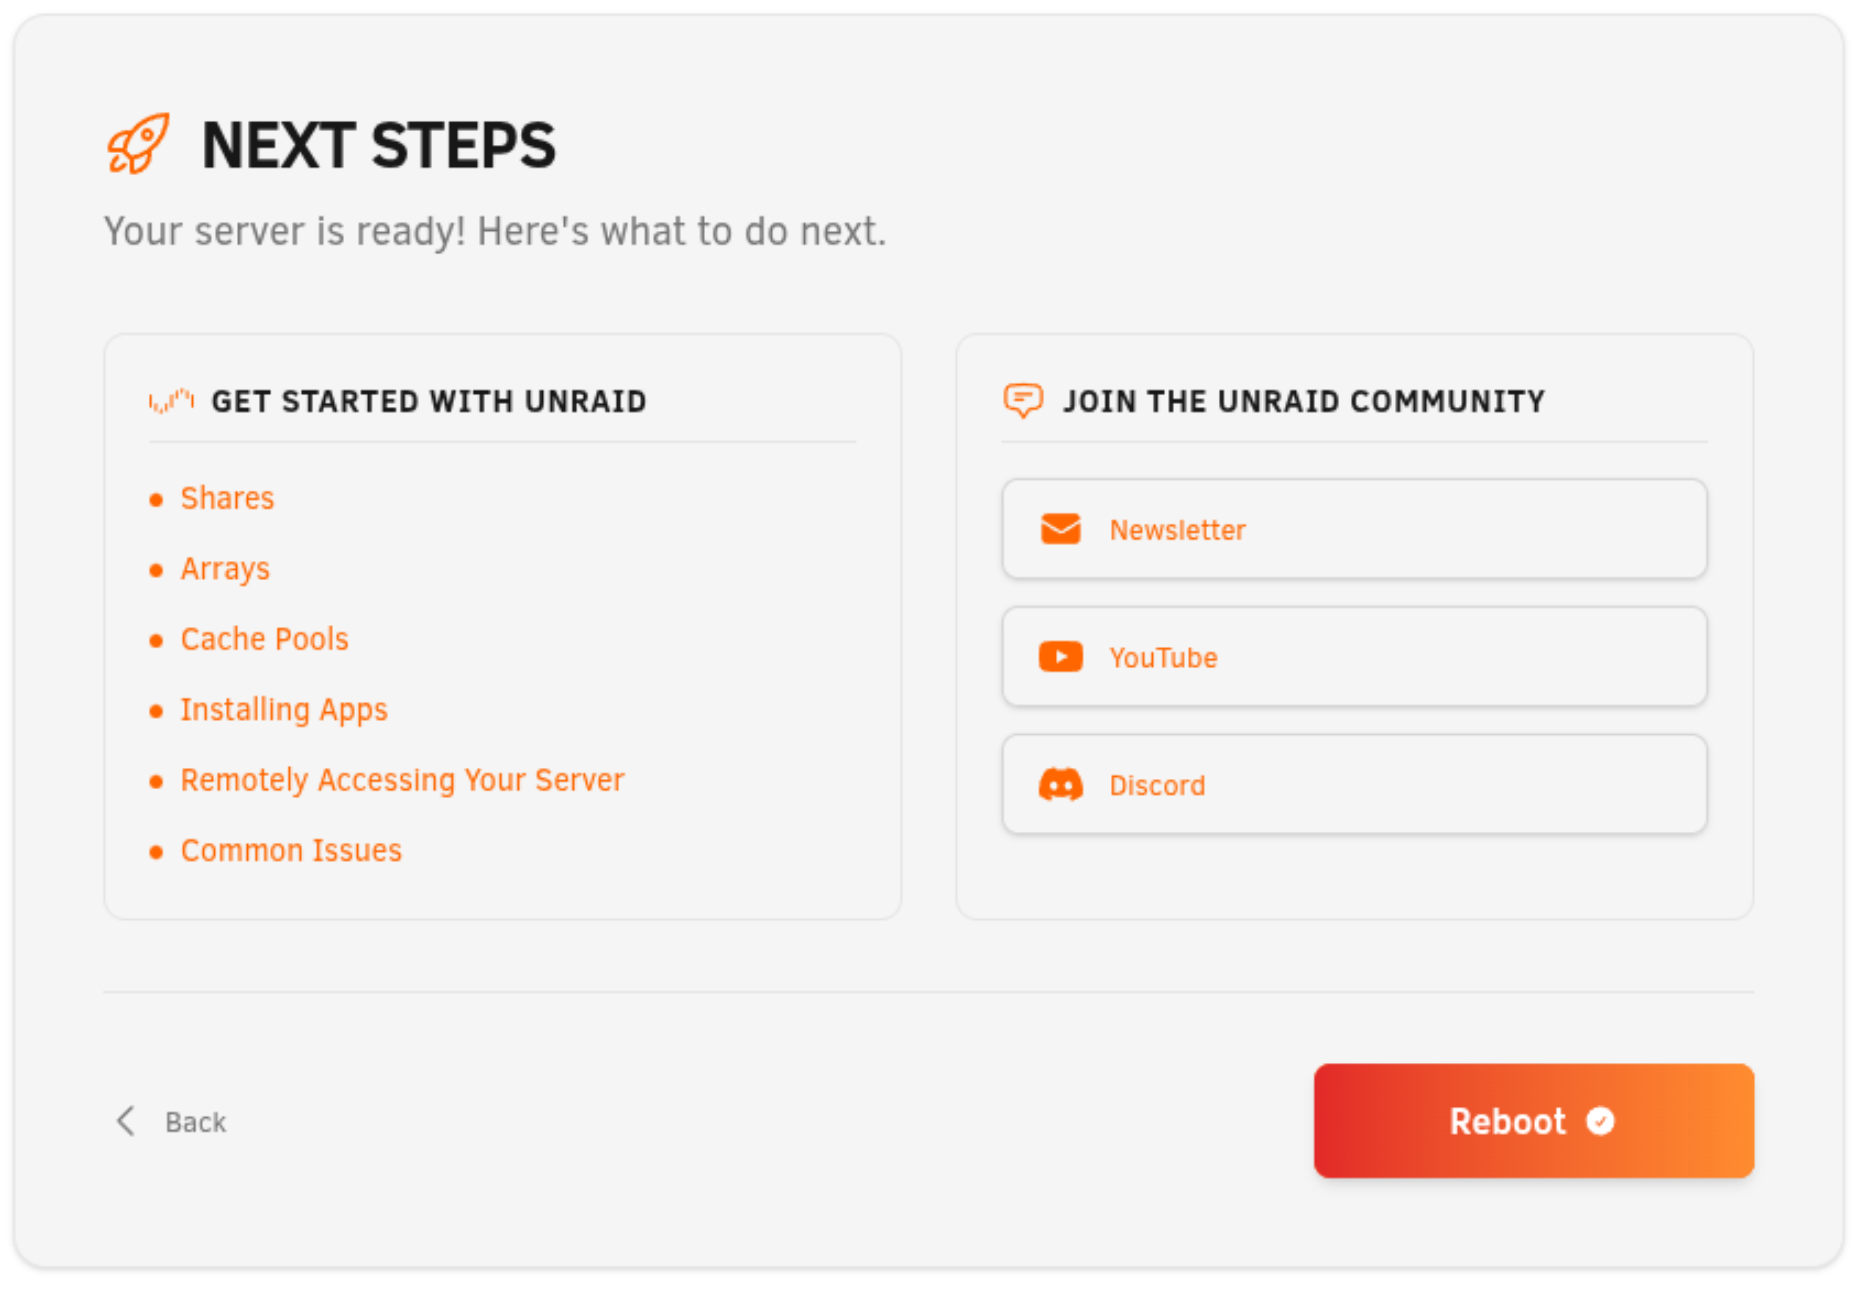
For internal boot questions, see the Internal Boot FAQ (7.3+).
BIOS 建议
Log in to your Unraid.net account to obtain a license key:
-
在 WebGUI 中,转到 快速入门 部分。
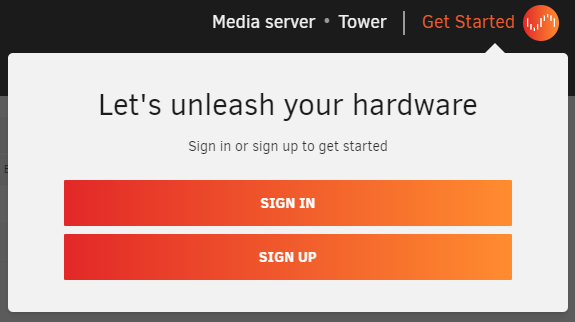
-
登录或创建帐户后,将自动安装试用密钥。
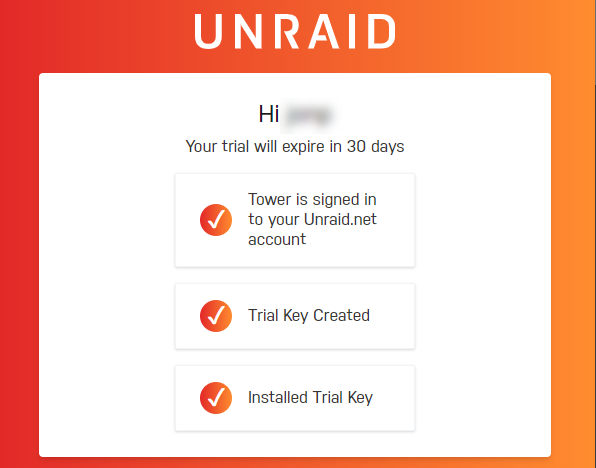
此过程允许您管理 Unraid OS 许可证密钥、获取新密钥、恢复丢失密钥或升级许可证。
For details on your license, visit Tools → Registration in the WebGUI.
BIOS 建议
在部署 Unraid OS 之前,务必验证系统的 BIOS 和存储控制器设置。下面是一个检查清单,帮助确保兼容性、稳定性,并获取关键功能。
点击展开我们的 BIOS 和存储控制器检查清单
正确配置 BIOS 和存储控制器对稳定的 Unraid OS 部署至关重要。第一次引导前请使用此清单。
基本设置
✅ 设置 USB 闪存驱动器为主要启动设备。\n✅ 配置存储控制器为通过 SATA 连接的 AHCI 模式。\n✅ 将控制器设置为 HBA 模式 (不是 RAID)。\n✅ 禁用 安全启动,因为 Unraid OS 不支持此功能。
高级设置
✅ Enable hardware virtualization features (e.g., Intel VT-x or AMD-V) for virtual machines (VMs).
✅ Enable IOMMU support (Intel VT-d or AMD-Vi) for PCI device assignment to VMs.
故障排除技巧
如果 Unraid OS 无法启动,尝试:
✅ 调整启动顺序为:Forced-FDD、USB-HDD、USB-ZIP。\n✅ 禁用 USB 2.0/3.0 支持。\n✅ 切换任何快速启动功能。\n✅ 切换 USB 键盘支持。
欲了解更多帮助,请访问 Unraid 一般支持论坛。
Many motherboards limit boot device selection to 12 hard drives. If your USB flash drive is recognized as a hard drive, you may not be able to boot from it after installing 12 physical hard drives. Configure the BIOS to treat the flash drive as a removable device whenever possible.
If using an add-on HBA, you may be able to disable INT 13h support to prevent its connected drives from appearing in the bootable devices list, helping to stay within the 12-drive limit.